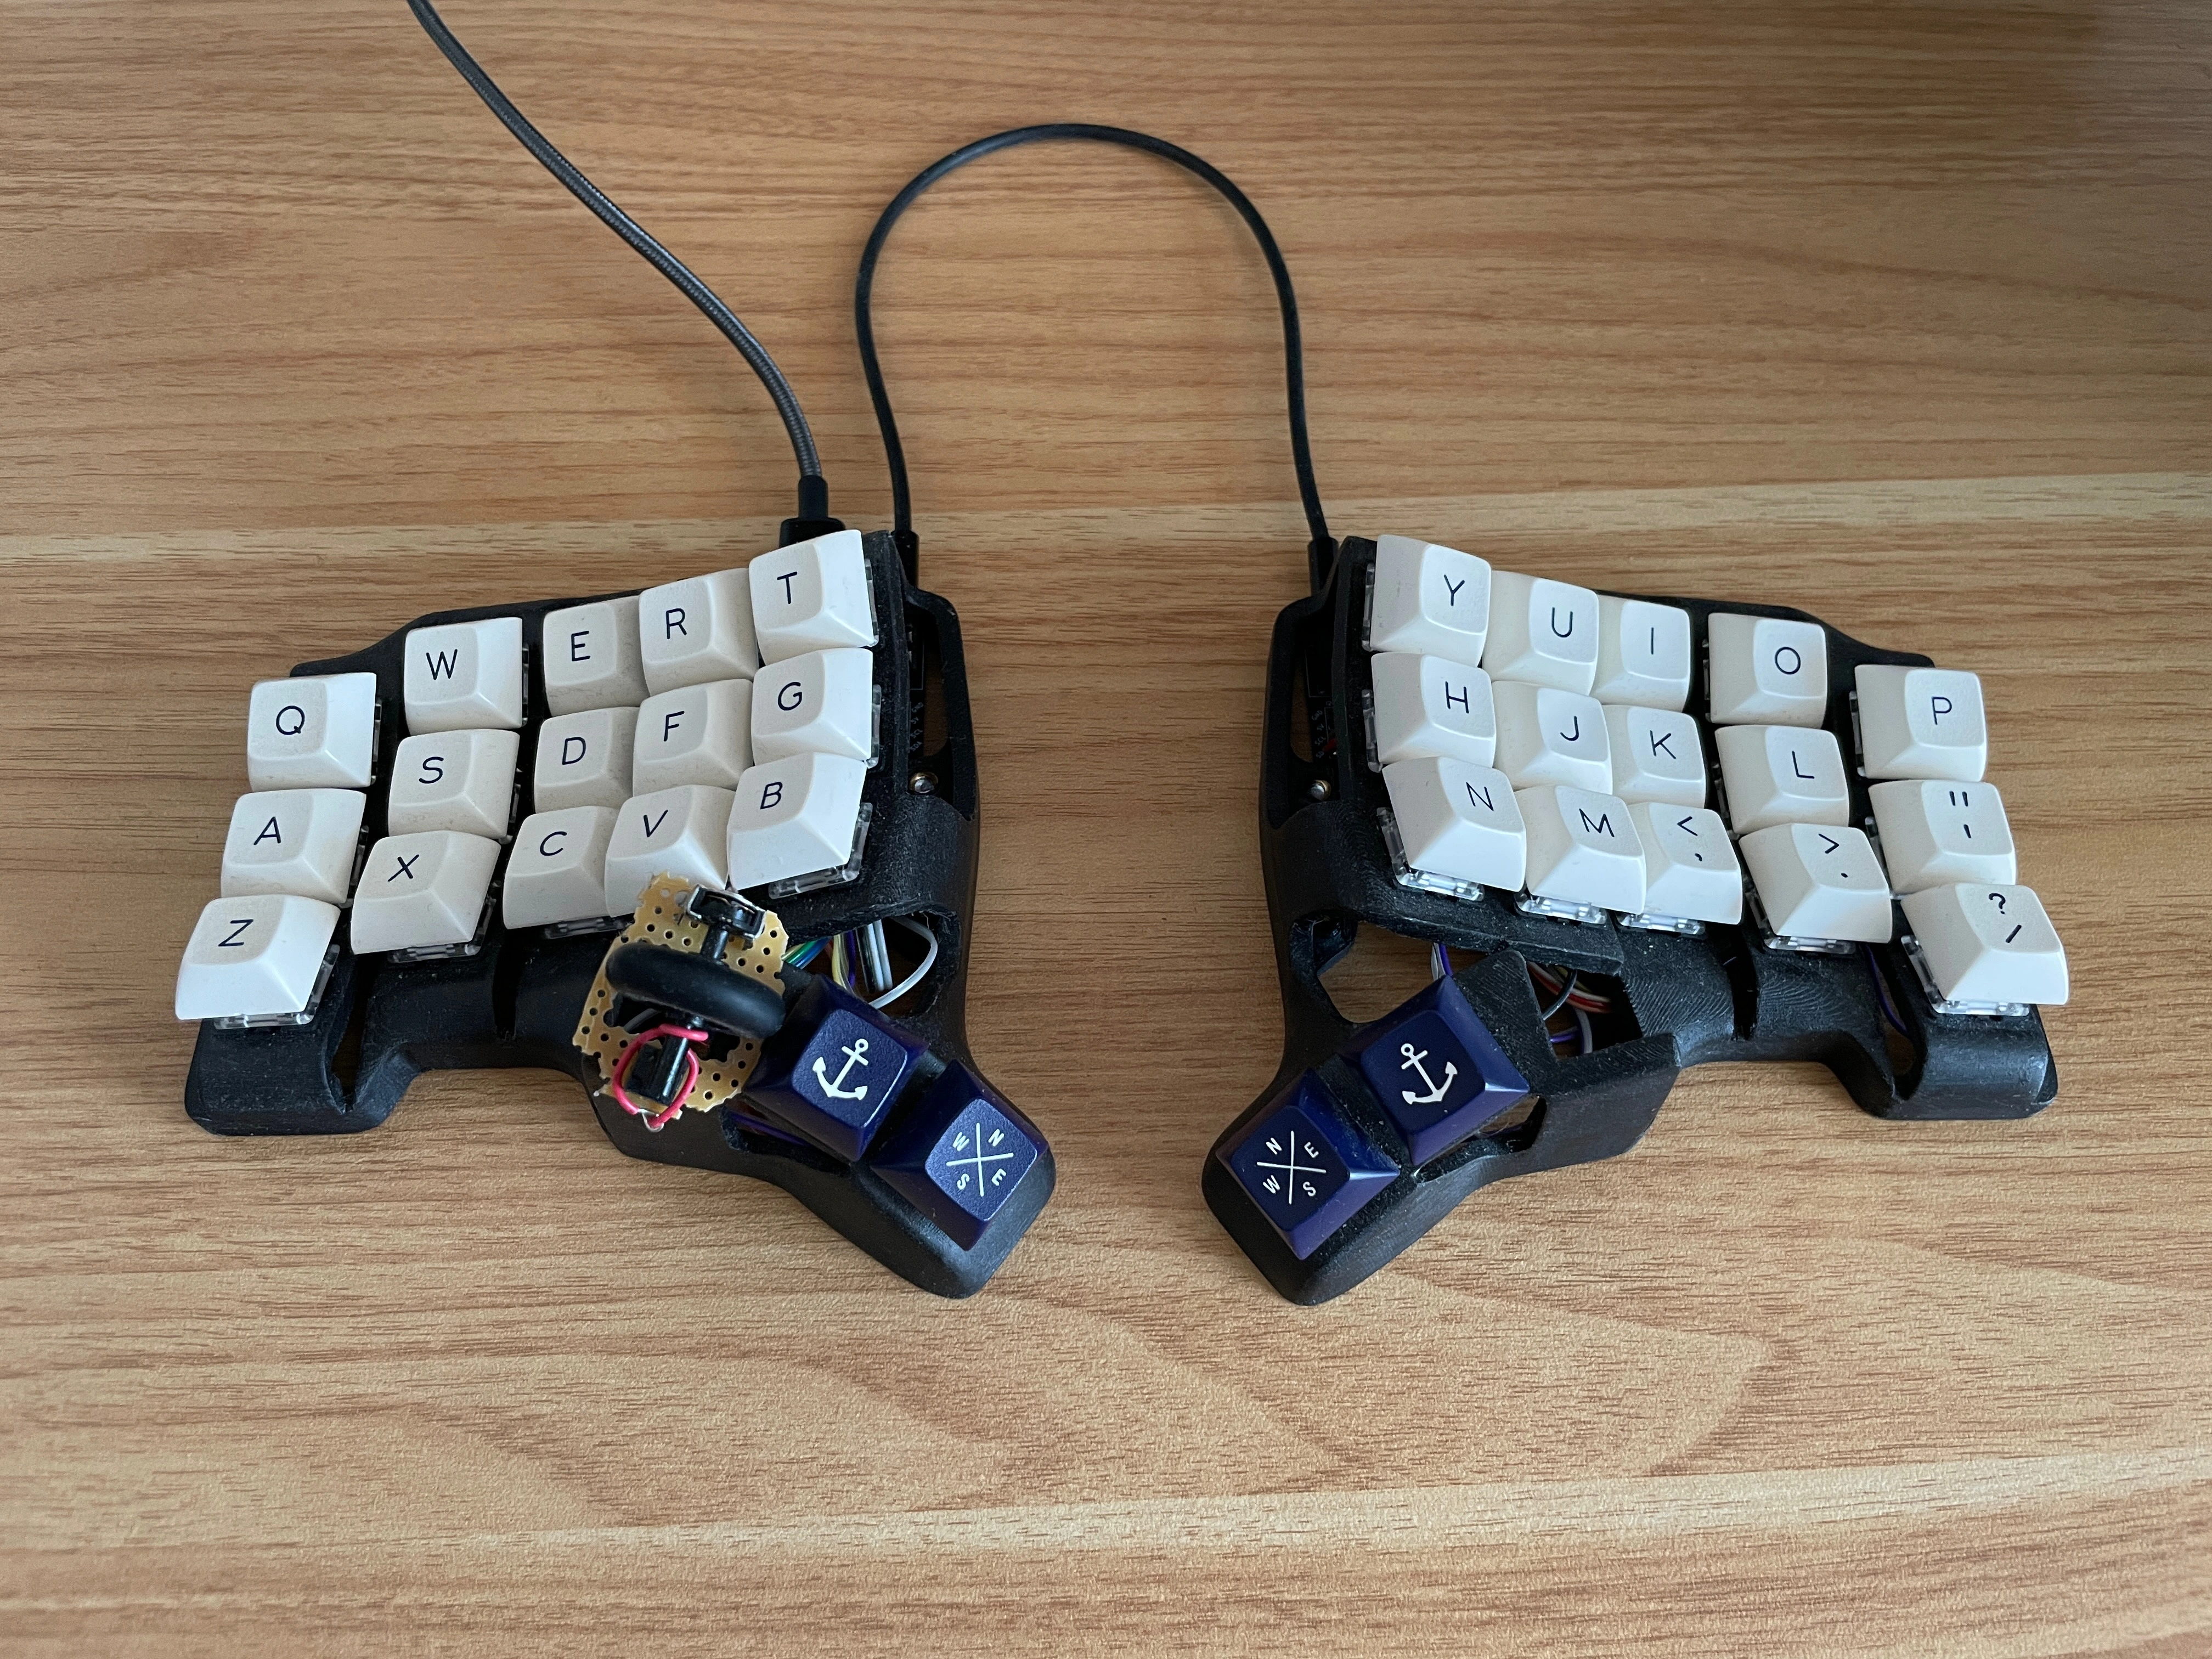
Got the model directly from the creator‘s github at https://github.com/Bastardkb/Skeletyl Had a friend print it for me. It was quite laborious to get all the support material out, I think my friend ignored the recommended print settings 😂 Other than that, it was pretty easy. Do you have any specific question?
Yep, the scrollwheel works exactly like a rotary encoder and can be used like one in qmk (see linked config).
I first tried the setup by wiring the wheel to the original mouse pcb and after confirming that I like the setup I set it up in QMK, which was very easy, but I had to unsolder two resistors for the leds on the pro micro to get two additional pins that I had to secure with hot glue. The Frood has more pins, so after moving to them it is easier.
I built a 34 key Skeletyl with a scrollwheel


"Custom" version of the Skeletyl with DSA Royal Navy keycaps I use as my daily driver. Recently added a scroll wheel to it using QMK rotary encoder support.
Looks shitty, but works great.
This build started out as a super low budget keyboard because I wasn't sure if I would like the sculpting (was coming from a 36 key corne). Switches are Gateron browns. I prefer linear switches, but this was what I had lying around.
When sanding the 3d print, I broke the third thumb key slot on the right hand side and decided to make this misfortune into an advantage and build a 34 version instead, saving me from having the hassle with diodes and go for a direct pin layout a la sweep instead.
Controllers were two micro usb chinese pro micro clones that were just floating around in the case and the two sides were connected directly by wire without any jacks (see imgur for a picture if you dare :P).
Turns out I loved it so I have been improving it since by adding properly mounted controllers (Frood) and the experimental scrollwheel. Next are the bottom plates :)
I first tried using the panasonic Panasonic EVQ-WGD001 but didn't like how they scrolled at all, it was veeeeery hard to turn them. Might have just been the ones I got, but made them unusable for me.
Keymap and keyboard config: https://github.com/manna-harbour/miryoku_qmk/compare/miryoku...luqasn:miryoku_qmk:miryoku
More pictures here: https://imgur.com/a/16XWDQ7
Bit of a too open question. I’d recommend sticking with this board for a couple of months (looks portable enough to take to the office) and see if you maybe wanna try less keys or maybe sculpted (dactyl-style), different stagger, tenting, etc, for your next build. Also, you probably have hotswap on this one, so you could experiment with switches for that next build already.