HELP: combining "decals" with alpha in compositor
HELP: combining "decals" with alpha in compositor
Hi
So, the thing I want to accomplish is to add .png images, compile them and then transform the compiled montrosity (move/scale, etc).
But the thing is, if I “alphaover” the images with some offset, for example:
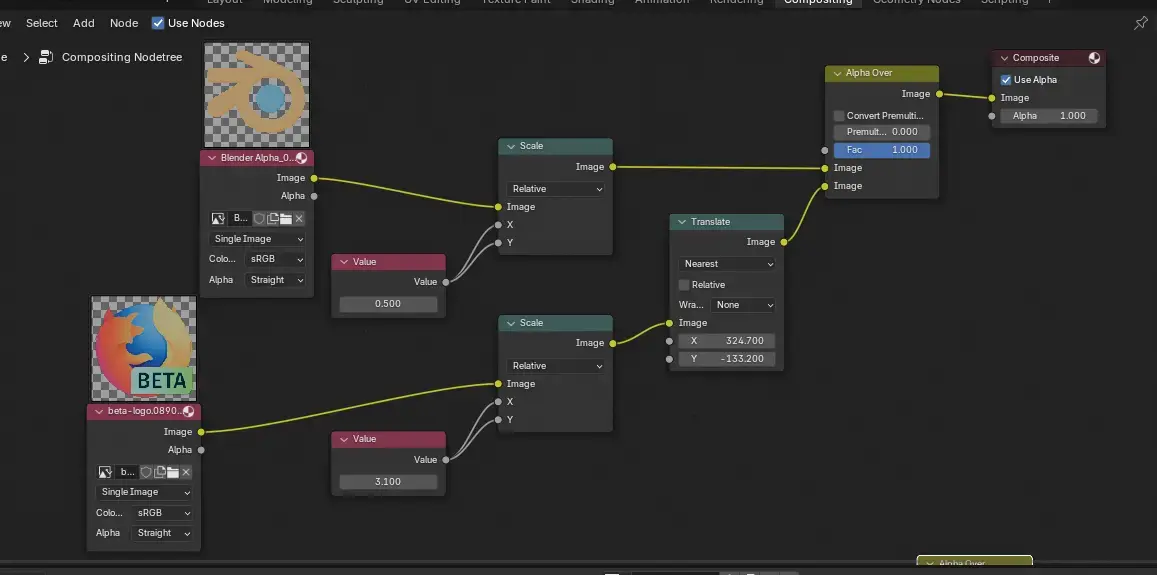
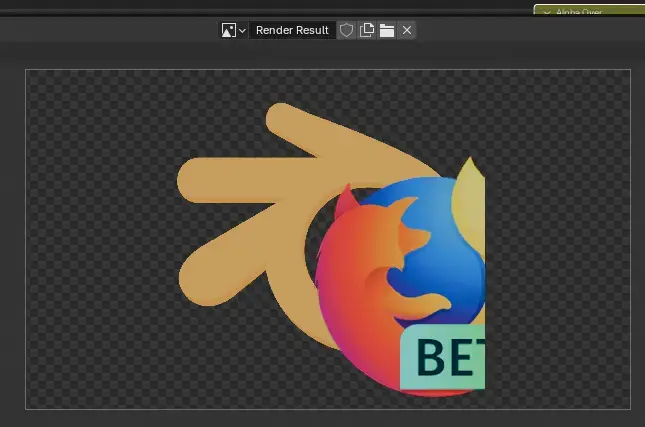
the image laid over the other cuts off, as the overlay can’t reach outside the dimensions of the underlaying one.
I know I can just:
- use eg. gimp and combine the images there, but I’d rather have my workflow entirely in blender.
- add transparent padding for ~billion pixels around the decal as a workaround, but that sounds silly and “bruteforcing” the concept.
How would I go about getting all overlaid images to display in full in such case? I’ve tried different options on the “alpha over” and “color mix” -nodes without results, but entirely possible that I just missed some critical combination.
So, thoughts?
You're viewing a single thread.
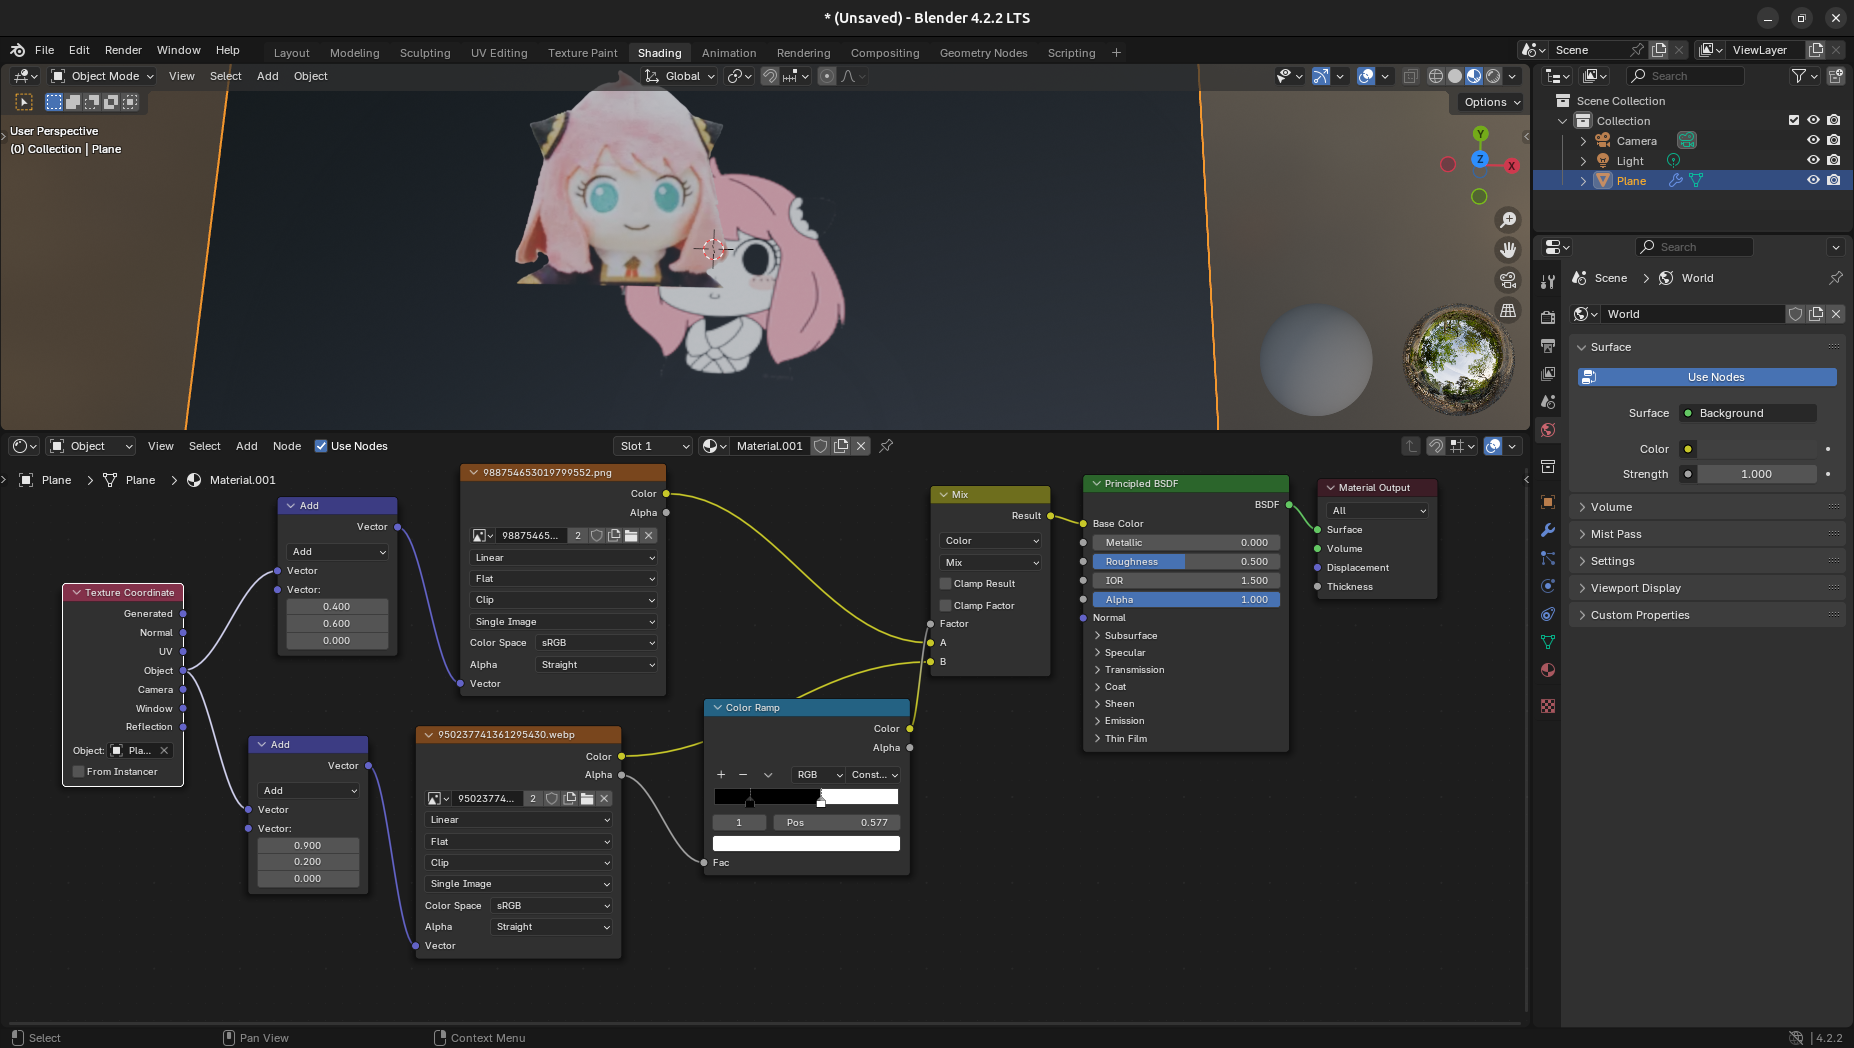
Why do you use composite nodes? What do you want to accomplish?
I happen to accomplish similar result with shader nodes on a plane as I am more familiar with them.
image
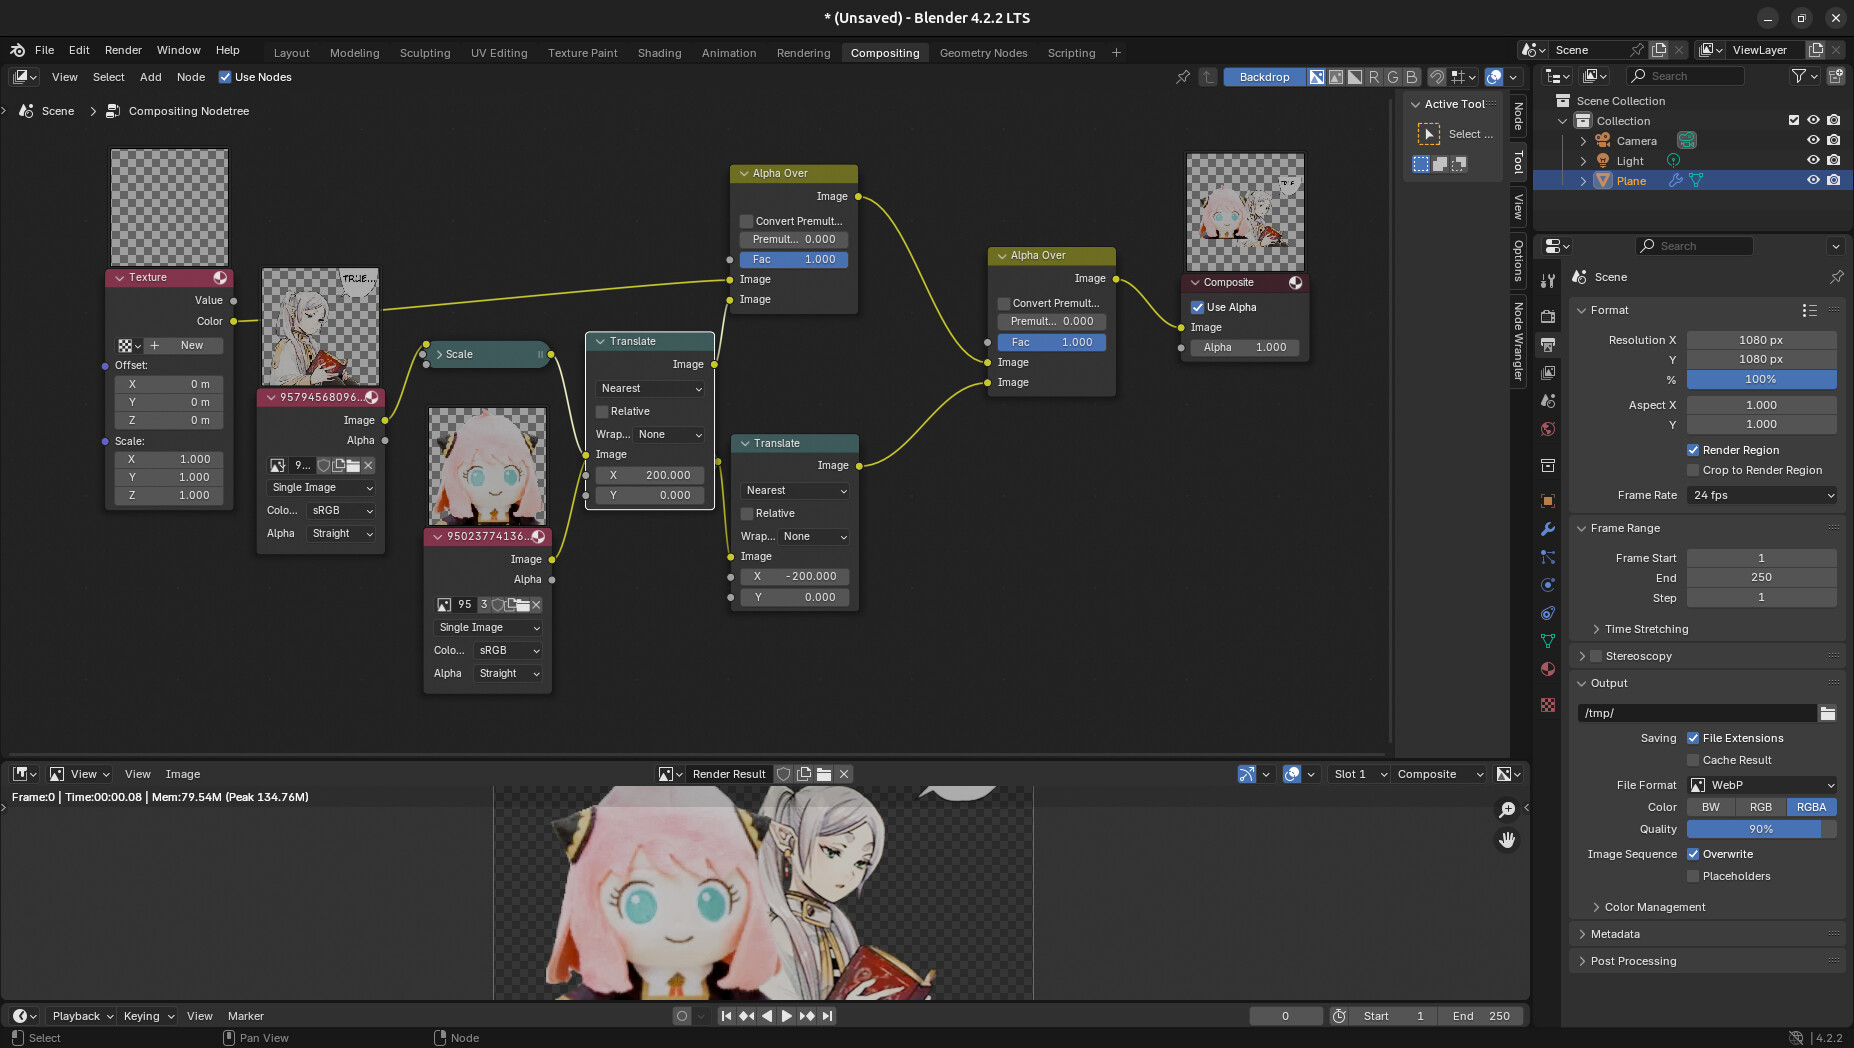
Edit: made it work as you will still be outputting an image with Output>Format>Reslotution regardless of crop of composited images
So essentially what I'm doing is thumbnails for my yt-videos, the scene itself is my logo & a video episode number (geonode thing that generates number outline, etc, all I need to do is change the number in geonode settings).
Essentially:
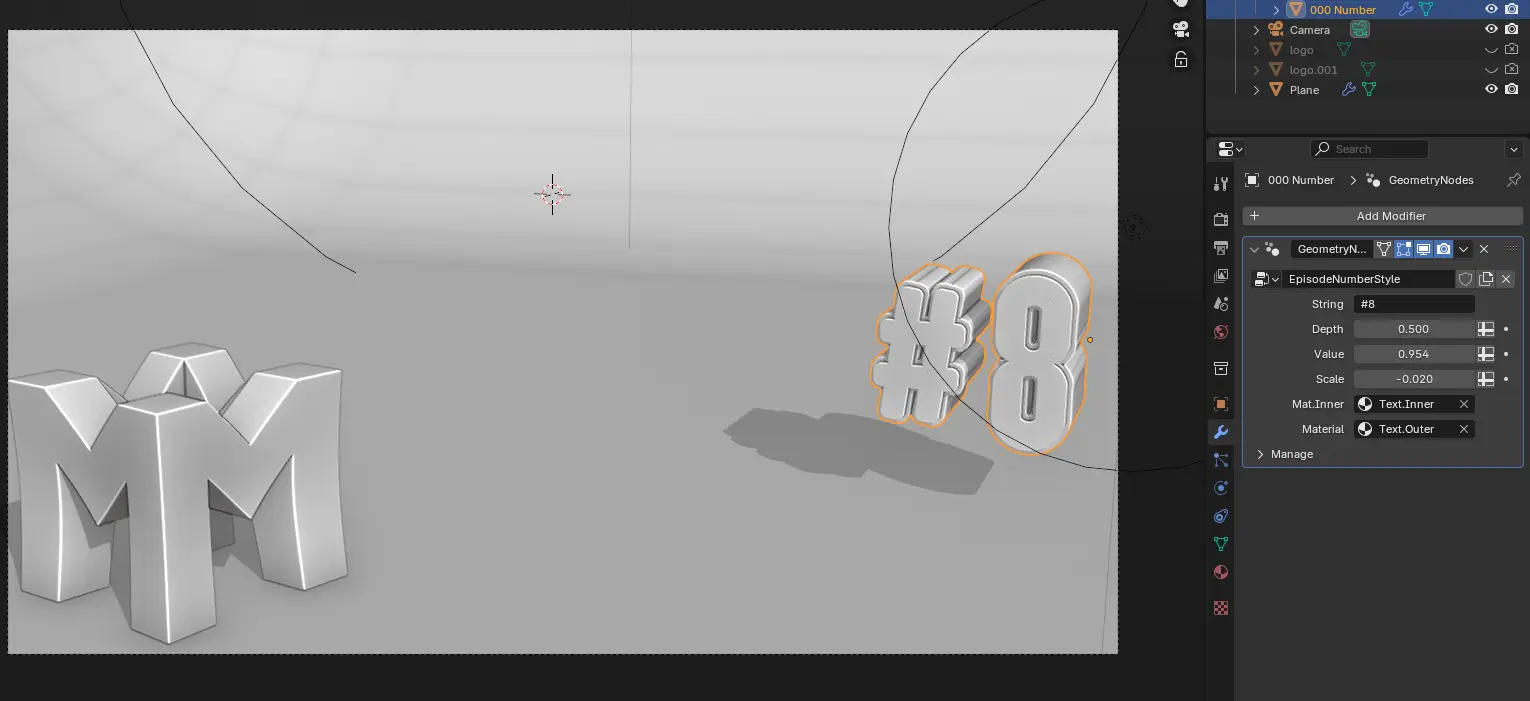
the ground "plane" is a shadow catcher.
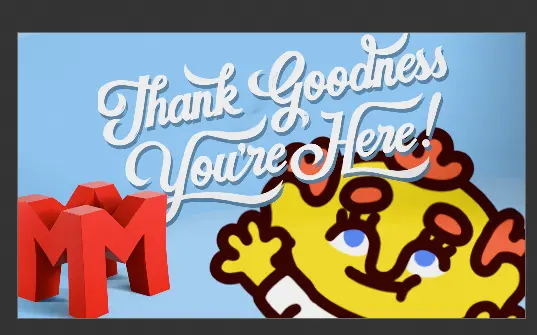
Then in compositor I want to add eg. game logo & some screenshot/relevant scene/background from game -> position/rotate them (separately) -> done. This is essentialy once-and-done.
Occasionally the logo and background don't play nicely, so the logo needs some dropshadow, for this I sometimes just use the logo's alpha to make a black version of it & offset it somewhat under the original logo.
(the left-corner of the first word of the logo)
And this is where the cropping issue can happen. And as stated in op, I could add padding to the image, but again extra step OR do it logos/backgrounds in gimp.. etc etc, there are out-of-blender options, easy ones. But: Ideally I'd want to automate everything for the ultralaziness. :)
edit: I did at once point add the logos as planes in the scene (as seen in the object outliner), but that was bit fiddlier than just dropping them in place in compositor, and similar "dropshadow" issue still existed, kinda. Some offset second plane does work - kinda. But logos tend to vary in size and aspect ratio, so it becomes fiddly rather quick - the compositor is easier in this case.
So I think the second "alpha over" node like showed in root comment would work. The top link in the node sets the size of the working area so plugging in something in the size of the render region will work. (The scale node is obscured due to my carelessness)
it's still padding but not a bilion of pixels as you feared.